You may be wondering how to make your own essential oils. Its a simple process that anyone can do. And, it can save money long term.

Are you budget-conscious, into alternative health, and love to do-it-yourself? Then consider learning how to make your own essential oils.
Essential oils have been used for a wide variety of health benefits for centuries. These pleasant-smelling liquids contain medicinal compounds. They’ve been used to treat several different ailments, the natural way, for eons.
But buying oils at retail price can add up. If you’re trying to pinch pennies but want to have a natural medicine cabinet with your own oils, here’s how to get started making them at home. In very little time, you can extract the medicinal natural oils from plants, herbs, fruit peels, or flowers (or all the above.)
How to Make Your Own Essential Oils: Basic Method
STEP 1: CLEAN THE PLANTS
Let’s say that you have some stress and anxiety you’d like to relieve through an essential oil. Maybe you look up what plants have been scientifically proven to improve mood through essential oil inhalation or rubbing on the temples. Rosemary is one of those plants.
The first thing you’ll want to do with a handful of rosemary sprigs you’ve cut from your garden or wild rosemary, is to wash it. You can also use a combination of plants or flowers to make an oil that has a particular desired outcome.
One example is a mix of Ylang Ylang, Orange, Tangerine, Patchouli, and Blue Tansy, which a popular brand of oils labels as “Peace and Calming.”
Whatever mix or single oil you desire, just make sure you wash the plant/herb/peel/flower in purified water. Many cities have excessively high amounts of chemical particulates in their their drinking water.
Washing the plants in pure water will remove any residue, toxic sprays or fungus that may have accumulated on the plant.
STEP 2: SELECT A CARRIER OIL
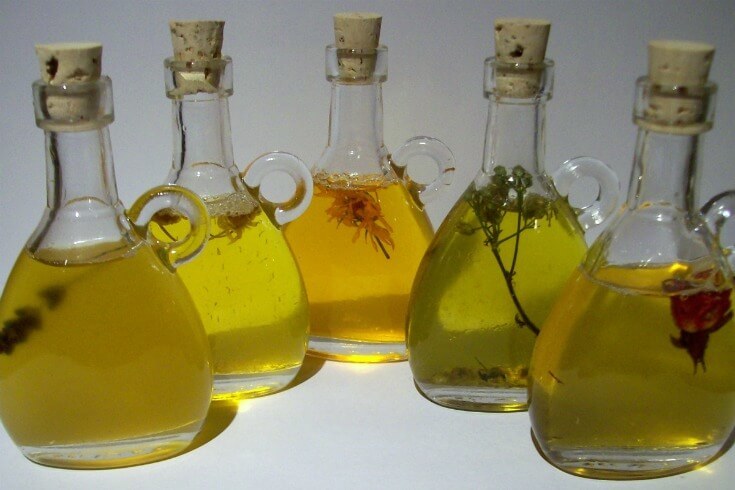
The term “essential” in essential oil refers to the so-called “essence” of an oil. But you can’t just, say, pick a bunch of wild lavender, wash it and let it soak hoping to capture its essence. Nope, essential oils are very concentrated. And to capture the essence of a plant (or plant constituent such as fruit peel; after all, fruits come from trees) you need a carrier oil. The most common carrier oil is sweet almond oil.
You can also capture essences with alcohol. Although it might sound unhealthy to use alcohol, as long as rubbing alcohol is not used, alcohol—ethyl alcohol in particular—is safe (as long as it’s not swallowed!), and can be an easy ingredient to use to make your own essential oils.
STEP 3: EXTRACT THE OIL
The first step in extracting the oil is to place your plant material in a pot. Do not use metal. Use enough carrier oil (safflower oil is another inexpensive oil you can buy from a market) or ethyl alcohol to cover your plant material.
Let the plant matter soak in the oil or alcohol for at least a day or two. Using a strainer as you would for pasta, capture the strained liquid in a container. Squeeze out as much oil as you can! Don’t let any go to waste. To ensure you’re getting every last drop, you can use a paper towel (or your clean hands) to press down on the botanicals.
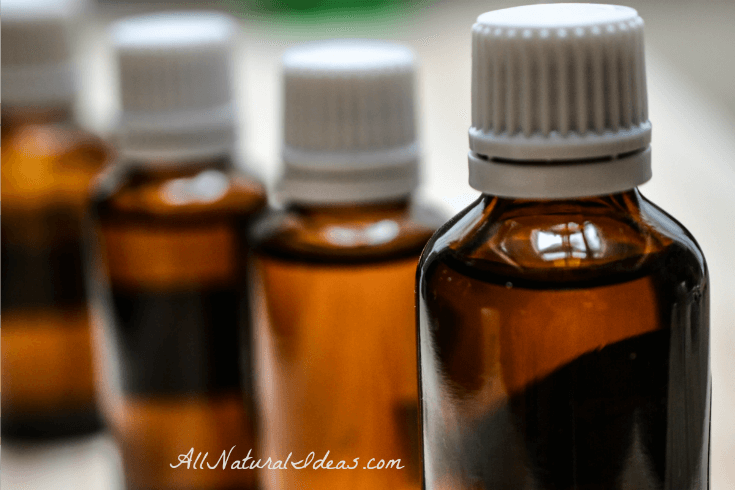
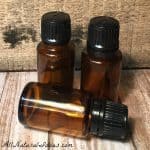
Store the oil in dark bottles. Just as the best olive oils are stored in dark, opaque containers, so, too, are essential oils. Heat and light can denature (spoil) the oils, so make sure you at least store the oils in a cool dark place if you can’t find any opaque containers.
That’s it! You’re done. It’s that simple. Now you know the basics on how to make your own essential oils.
Actually, it’s a little more time-consuming than that. One of the best practices of making your own essential oils at home is to repeat this process several times. You would do this by adding more and more of your preferred botanicals. This step would be repeated until you’re pleased with the fragrance of the oil. Maybe it would smell strong enough for you after just one extraction; if not, a couple more extractions may be required until the essential oil has a pleasing scent.
Jojoba, fractionated coconut, and olive oils are also common carrier oils.
If using alcohol and you want to remove the alcohol from the oil, you can freeze the extraction overnight in a jar. The oil will separate from the alcohol. You may want to keep the alcohol, though, if you’re going to use the essential oil as a fragrant, all-natural perfume.
How to Make Your Own Essential Oils: Alternate Methods
One of the best ways to get the medicinal compounds out of the oils, without keeping the rest of the plant matter is through steam distillation. The problem with steam distillation, though, is that it’s more of an involved process. There are essential oil stills you can purchase to make your own oils at home. It’s somewhat like a high-school chemistry experiment. You’ll need a pressure cooker, pipe, an essencier, which acts like a filter, keeping out the plant matter you don’t want ending up in your essential oil bottle.
You’ll also need a cooling tub, which is sort of like a bucket, which connects to the pipe. And last but not least, you’ll need to filter the oil through a cheesecloth. For those that enjoyed doing experiments in school, this method could be the most fun.
Some people who make their own essential oils also add a bit of vitamin E to the oil mix. Vitamin E is a natural preservative. A simpler alternative to the complicated, techy steam distillation method is to mix the carrier oil, a few drops of vitamin E, and the plant matter into a pot on the stove and occasionally stir while on very low heat for several hours.
Whichever method you choose, you’ll feel a sense of accomplishment by making your own essential oils at home. Just be aware that essential oils can cause rashes if applied directly to the skin. That’s why they are often diluted in a carrier oil before applying. They can also be very harmful if swallowed. Be extra aware if you’re making your own oils at home and have very young children in the house. Aside from the obvious risk of poisoning through swallowing, inhaling the vapor through a vaporizer may pose a risk of respiratory problems.